设置KMS服务器并激活Windows和Office
Last modified 2025-11-17
本教程通过自行创建KMS服务器来实现激活Windows和Office,这样可以避免因为互联网KMS服务器的失效而导致激活失败
创建KMS激活服务器
安装Linux服务器或者购买Linux VPS
安装Docker
执行以下命令来安装KMS激活服务端
sudo docker run -d -p 1688:1688 --restart=always --name vlmcsd mikolatero/vlmcsd
打开防火墙1688端口
设置DNS域名(可选)
激活零售版Windows 10/11
通过管理员权限运行CMD,分别执行以下命令
slmgr.vbs -upk (卸载当前的产品序列号)
slmgr.vbs -ipk <Product ID> (安装产品序列号)
Product ID需要根据不同的Windows 10/11版本输入不同的产品序列号
Windows 10/11 Pro W269N-WFGWX-YVC9B-4J6C9-T83GX Windows 10/11 Pro N MH37W-N47XK-V7XM9-C7227-GCQG9 Windows 10/11 Pro for Workstations NRG8B-VKK3Q-CXVCJ-9G2XF-6Q84J Windows 10/11 Pro for Workstations N 9FNHH-K3HBT-3W4TD-6383H-6XYWF Windows 10/11 Pro Education 6TP4R-GNPTD-KYYHQ-7B7DP-J447Y Windows 10/11 Pro Education N YVWGF-BXNMC-HTQYQ-CPQ99-66QFC Windows 10/11 Education NW6C2-QMPVW-D7KKK-3GKT6-VCFB2 Windows 10/11 Education N 2WH4N-8QGBV-H22JP-CT43Q-MDWWJ Windows 10/11 Enterprise NPPR9-FWDCX-D2C8J-H872K-2YT43 Windows 10/11 Enterprise N DPH2V-TTNVB-4X9Q3-TJR4H-KHJW4 Windows 10/11 Enterprise G YYVX9-NTFWV-6MDM3-9PT4T-4M68B Windows 10/11 Enterprise G N 44RPN-FTY23-9VTTB-MP9BX-T84FV Windows 10 Enterprise LTSC 2021 M7XTQ-FN8P6-TTKYV-9D4CC-J462D Windows 10 Enterprise N LTSC 2021 92NFX-8DJQP-P6BBQ-THF9C-7CG2H slmgr.vbs -skms <KMS Server>:<Port> (设置KMS激活服务器)
KMS Server为上文的KMS激活服务器IP地址或者域名
默认端口为1688,也可以手动指定其他端口
slmgr.vbs -ato(激活Windows 10/11,如果提示Production activated successfully则表示激活成功)
下载安装并激活评估版Windows 10/11
评估版Windows 10/11下载地址(虚拟机文件)
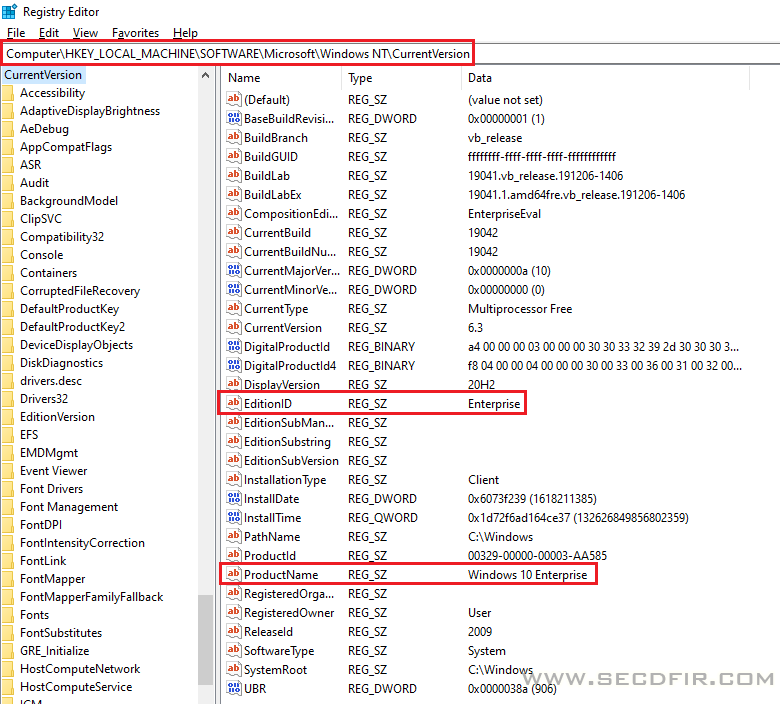
安装完成后打开注册表编辑器Regedit
进入以下注册表项
HKEY_LOCAL_MACHINE\SOFTWARE\Microsoft\Windows NT\CurrentVersion
将 EditionID 的字符串值由 EnterpriseEval 修改为 Enterprise
LTSC版的 EditionID 的字符串值由 EnterpriseSEval 修改为 EnterpriseS
将 ProductName 的字符串值由 Windows 10/11 Enterprise Evaluation 修改为 Windows 10/11 Enterprise
LTSC版的 ProductName 的字符串值由 Windows 10 Enterprise LTSC 2021 Evaluation 修改为 Windows 10 Enterprise LTSC 2021

打开此电脑
下载企业版 skus 文件夹,解压缩并复制到 C:\Windows\System32\spp\tokens\
确保C:\Windows\System32\spp\tokens\skus下可以看到 Enterprise或者 EnterpriseS 文件夹

通过管理员权限运行CMD,分别执行以下命令
slmgr.vbs /rilc
slmgr.vbs /upk
slmgr.vbs /ckms
slmgr.vbs /cpky
slmgr.vbs /ipk NPPR9-FWDCX-D2C8J-H872K-2YT43 (安装产品序列号)
LTSC 序列号为 M7XTQ-FN8P6-TTKYV-9D4CC-J462D
slmgr.vbs /skms <KMS Server>:<Port> (设置KMS激活服务器)
KMS Server为上文的KMS激活服务器IP地址或者域名
默认端口为1688,也可以手动指定其他端口
slmgr.vbs /ato (激活Windows 10/11,如果提示Production activated successfully则表示激活成功)
下载安装并激活评估版Windows Server
评估版Windows 下载地址
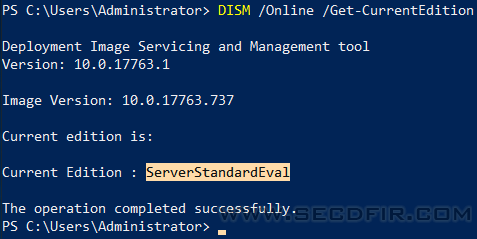
安装完成后,用管理员权限运行PowerShell
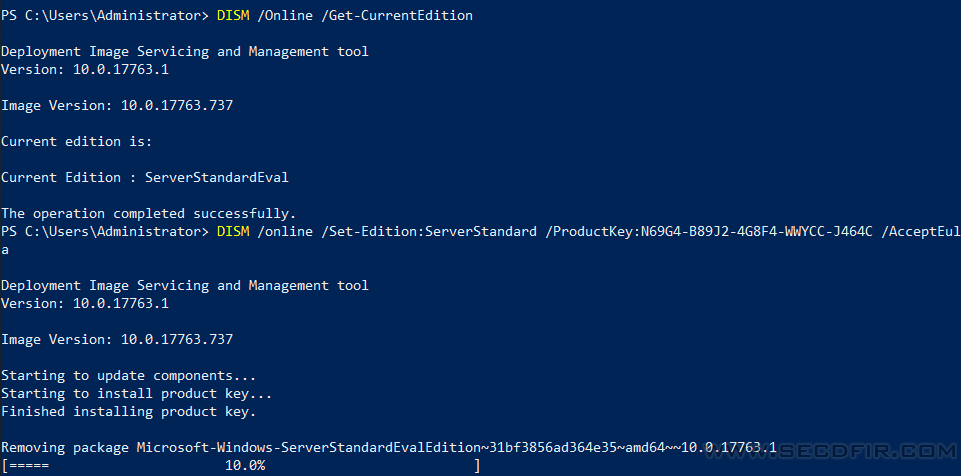
DISM /Online /Get-CurrentEdition(查看当前OS版本)

DISM /online /Set-Edition:ServerStandard /ProductKey:<Product ID> /AcceptEula(评估版转为零售版)
Product ID需要根据不同的Windows版本输入不同的产品序列号
Windows Server 2012 R2 Standard D2N9P-3P6X9-2R39C-7RTCD-MDVJX Windows Server 2012 R2 DataCenter W3GGN-FT8W3-Y4M27-J84CP-Q3VJ9 Windows Server 2016 Standard WC2BQ-8NRM3-FDDYY-2BFGV-KHKQY Windows Server 2016 DataCenter CB7KF-BWN84-R7R2Y-793K2-8XDDG Windows Server 2019 Standard N69G4-B89J2-4G8F4-WWYCC-J464C Windows Server 2019 DataCenter WMDGN-G9PQG-XVVXX-R3X43-63DFG Windows Server 2022 Standard VDYBN-27WPP-V4HQT-9VMD4-VMK7H Windows Server 2022 DataCenter WX4NM-KYWYW-QJJR4-XV3QB-6VM33 Windows Server 2025 Standard TVRH6-WHNXV-R9WG3-9XRFY-MY832 Windows Server 2025 DataCenter D764K-2NDRG-47T6Q-P8T8W-YP6DF 
运行以上命令后,输入“Y"重启系统

重启系统后,用管理员权限运行CMD
slmgr.vbs -skms <KMS Server>:<Port> (设置KMS激活服务器)
slmgr.vbs /ato (激活Windows Server,如果提示Production activated successfully则表示激活成功)
下载安装并激活Office 2019/2021/2024
通过此链接下载Office Deployment Tool
运行Office Deployment Tool并提取Office安装引导文件

这时应该能看到提取的安装引导程序和配置文件

修改configuration-Office2019Enterprise.xml配置文件,选择需要的组件,这里用默认值

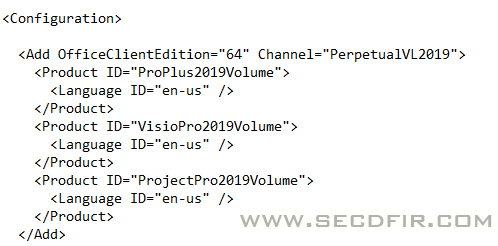
新版的Office Deployment Tool只提供Office365配置文件,因此需要手工创建2019/2021/2024的配置文件:
configuration-Office2019Enterprise.xml
<Configuration>
  <Add OfficeClientEdition="64" Channel="PerpetualVL2019">
      <Product ID="ProPlus2019Volume" PIDKEY="NMMKJ-6RK4F-KMJVX-8D9MJ-6MWKP">
         <Language ID="en-us" />
      </Product>
	  <Product ID="VisioPro2019Volume" PIDKEY="B4NPR-3FKK7-T2MBV-FRQ4W-PKD2B">
		  <Language ID="en-us" />
	  </Product>
      <Product ID="ProjectPro2019Volume" PIDKEY="9BGNQ-K37YR-RQHF2-38RQ3-7VCBB">
          <Language ID="en-us" />
      </Product>
      <Product ID="ProofingTools">
          <Language ID="en-us" />
      </Product>
  </Add>
  <RemoveMSI />
  <Display Level="None" AcceptEULA="TRUE" />
</Configuration>
configuration-Office2021Enterprise.xml
<Configuration>
  <Add OfficeClientEdition="64" Channel="PerpetualVL2021">
      <Product ID="ProPlus2021Volume" PIDKEY="FXYTK-NJJ8C-GB6DW-3DYQT-6F7TH">
          <Language ID="en-us" />
      </Product>
	  <Product ID="VisioPro2021Volume" PIDKEY="FTNWT-C6WBT-8HMGF-K9PRX-QV9H8">
		  <Language ID="en-us" />
	  </Product>
      <Product ID="ProjectPro2021Volume" PIDKEY="KNH8D-FGHT4-T8RK3-CTDYJ-K2HT4">
          <Language ID="en-us" />
      </Product>
      <Product ID="ProofingTools">
          <Language ID="en-us" />
      </Product>
  </Add>
  <RemoveMSI />
  <Display Level="None" AcceptEULA="TRUE" />
</Configuration>
打开Powershell,改变路径到安装引导程序文件夹,并输入 .\setup.exe /download .\<Configuration File> 下载安装包
待上一步完成后,继续输入 .\setup.exe /configure .\<Configuration File> 启动Office安装程序
安装完成后则表示Office 2019已经成功安装,接下来需要激活Office
通过管理员权限运行CMD
改变路径到Office安装文件夹
cd \Program Files\Microsoft Office\Office16
cscript ospp.vbs /sethst:<KMS Server> (设置KMS激活服务器)
KMS Server为上文的KMS激活服务器IP地址或者域名
cscript ospp.vbs /setprt:<Port> (可选,设置KMS激活端口)
默认端口为1688,也可以手动指定其他端口
cscript ospp.vbs /act (激活产品)
如果显示<Product activation successful>则表示激活成功
版权属于:Knight Guo
本文链接:https://secdfir.com/index.php/archives/9.html
商业转载请联系作者获得授权,非商业转载请注明出处
本作品采用 知识共享署名-相同方式共享 4.0 国际许可协议 进行许可。